Account Module
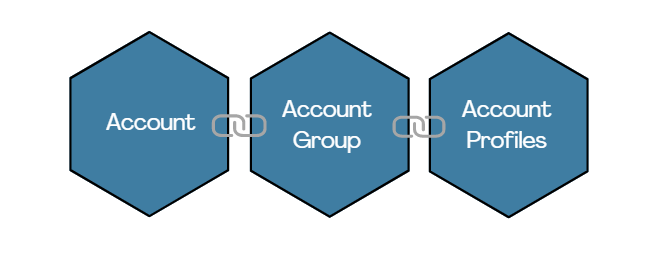
Account Module
XCore is a powerful margin engine that supports a number of XCore Account types that can help institutional clients, brokers, and hedge funds. It can track and manage risk settings like currency exposures, instrument positions, margin, NOP limits, and stop-outs. XCore Account Wallets further allow tracking of cash movements such as deposits, withdrawals, realised PL, commissions, swaps, and dividends. All data is visualised in real-time via the XCore Portal.
video=1086781909
Account
Accounts track positions and apply the pre-trade checks configured for their account type and account group. These checks can reject a trade or affect how much is routed to liquidity providers. You can configure four types of accounts: Risk, Margin, NOP, and Position. Position accounts track positions without applying trading limits.
video=754632119
For NOP accounts, positions that have reached their value date are excluded from the applicable exposure and P&L calculations. MARGIN accounts do not apply this value-date exclusion. Risk Accounts keep track of B-book trades and route trades to liquidity providers if any configured limits are exceeded. Positions of such trades will be tracked in the AccountPosition component and recorded as “overflow”. A Risk Account linked to a connector account must stay enabled.
Account ‘How to’
To create an account, open the Account component in XCore and click Add at the top to open the configuration window. Enter an account name and select the account group that the account will be linked to. For an account with no child accounts (a leaf account), enabling stopout requires a stopout connector account whose margin field points to this account. A parent account with stopout enabled uses n/a for its stopout route; closing orders are sent through the stopout connector account of each account with no children beneath it, which must be set even if that account’s own stopout is disabled.
The exposure limit is an account-wide, unleveraged cap expressed in the account group’s default currency. Set -1 to disable this cap; other margin, symbol, and currency limits remain independent. If an account is linked to a parent account, trade positions on the child account are also reflected on the parent account, and the parent’s limits apply to trades on its child accounts. The parent’s margin check uses the parent’s own balance, not the balances of its child accounts.
video=754744497
A RISK account can only be linked to a RISK parent, and POSITION accounts cannot have a parent. You can enter an account description and choose whether the account will be enabled when the pending configuration is applied. Use Verify to check the new account setup in Pending Config, then Apply & Restart to activate it.
AccountGroup
The account group component displays the account groups that are defined in the system and is used to create and delete account groups. This component allows for a faster setup of new accounts, as all the profile settings are already populated in various account groups. The account group component must be linked with a specific XCore account through the account component and is used to select account profiles and additional configurations of the account, such as swap profile, leverage, and underflow.
video=754680363
Each account group has a type that determines its purpose and behavior. Specific rules can be defined based on the account type by setting up their profiles. Additionally, the deposit currency and margin alert notification levels can be defined for each account.
AccountGroupSettings
Account groups created in the XCore have a type that determines its purpose and behavior. Specific rules for the account groups can be defined based on the account type by setting up their profiles. And this is done by the account group, settings module. From here, you can specify all of the account group’s characteristics such as warning, alert levels, deposit currency, currency limitations, swap profile, selection, symbol, leverage, and more.
video=754686309
AccountGroupSettings ‘How to’
Account groups are created in two stages. Firstly, the account group must be given a name, which is done by clicking Add in the AccountGroup component before the changes can be applied. The account group settings must be added via the AccountGroupSettings component. Click Add at the top to open its configuration window.
video=754686309
Choose the account group that needs to be edited from the key field. Choose the account group attribute that you would like. To set from the value field, choose a value that you would like to set. Repeat this process for all the group attributes that you need to set. Use the verify tool to check if the account group settings will save correctly. Use Apply & Restart to activate the AccountGroup setup saved in Pending Config.