XCore Portal
The XCore Portal provides XCore configuration, account and position management, order tracking, and monitoring. Users can arrange components in layouts, tabs and side panels, save their workspace, and export layouts to share with other users.
For current reporting instructions, use the Reporting Portal.
Intro to XCore Portal
Create and Manage Tabs
Import/Export Layouts
Grouping Multiple components on same layout
Filtering Data within a Component
Editing data in a Component
Managing Columns within a Component
Automatic Linking Components
Fetch Functionality
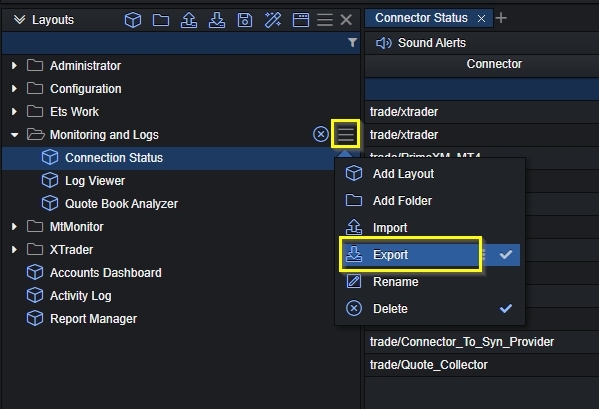
XCore users can use the Export/Import functionalities to easily export configured layouts to share them with their team with the purpose of importing them to their own XCore Portal interface
Layouts can be exported individually as well as the whole folder which could contain several different layouts.
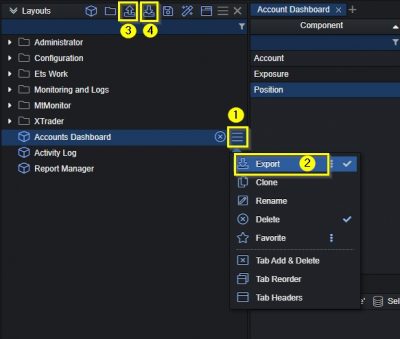
- Open additional layout settings
- Export individual layout template
- Import layout/s into the XCore Portal
- Export the full layout tree on the left side panel
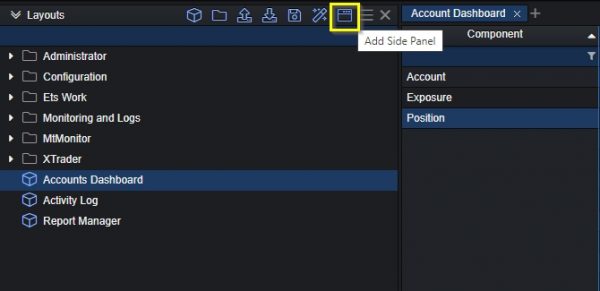
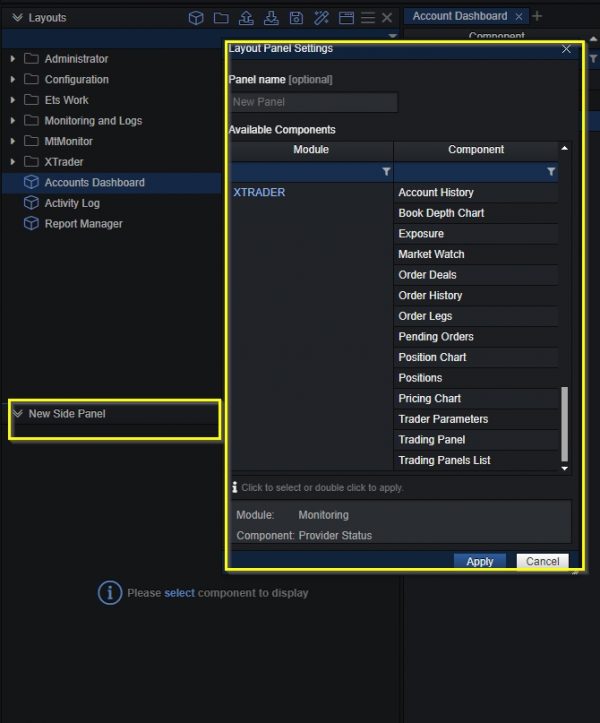
The Add Side Panel button allows the users to add a small side panel on the left side of the portal which will be fixed only to that location. The side panel is more useful for small-sized components, or components which used the filtration option.
To add a side panel, click the Add Side Panel button from the top left side menu, after which the user is prompted to add a component that will be located in the side panel.
The naming of each component (Tab Headers) that is presented on the layout can be removed if needed for a cleaner layout. You can achieve this from the additional settings of the layout by pressing the Tab Headers button which will hide each component name shown. To unhide, follow the same procedure.
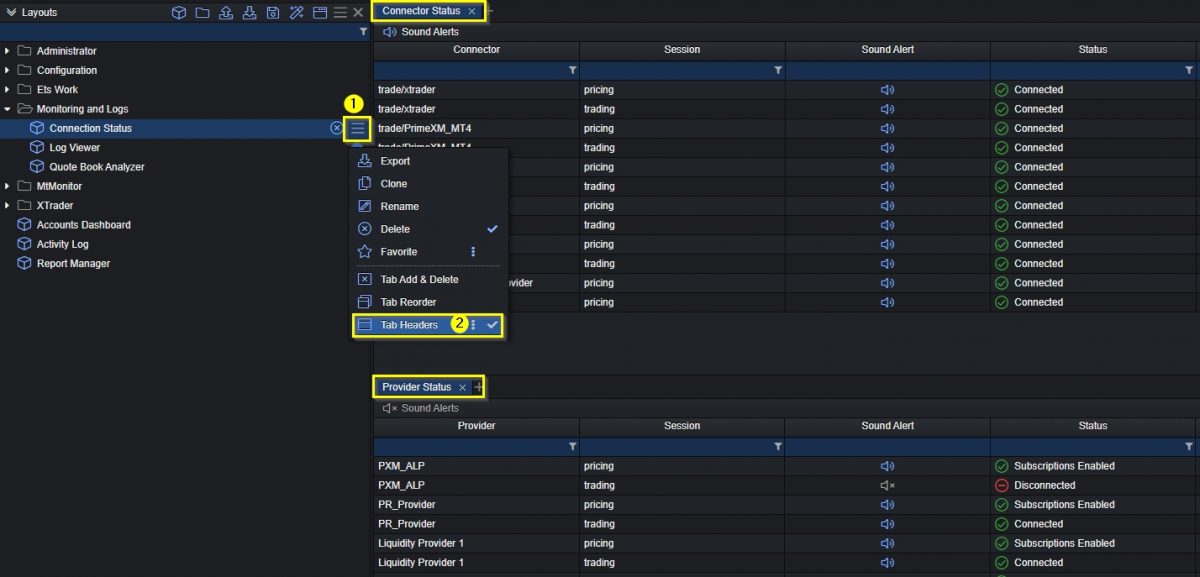
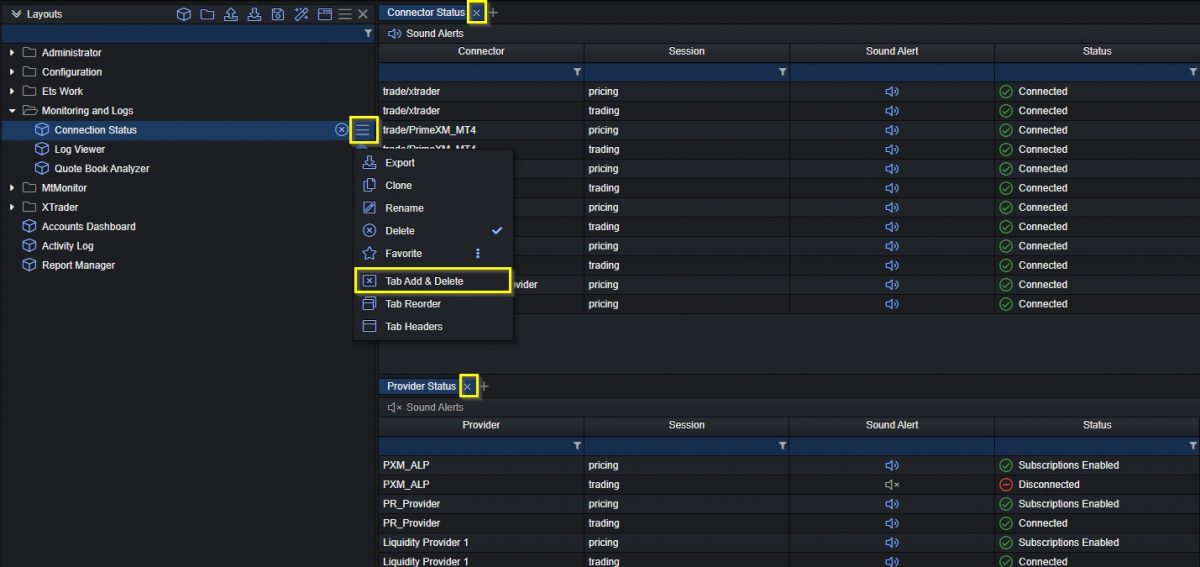
The flexibility of the XCore Portal allows its users to remove the close buttons of each component which is shown on the layout, to avoid the accidental closing of a specific component. You can achieve this from the additional settings of the layout, press on the Tab Add & Delete button which will remove the X buttons. In order to unhide, follow the same procedure.
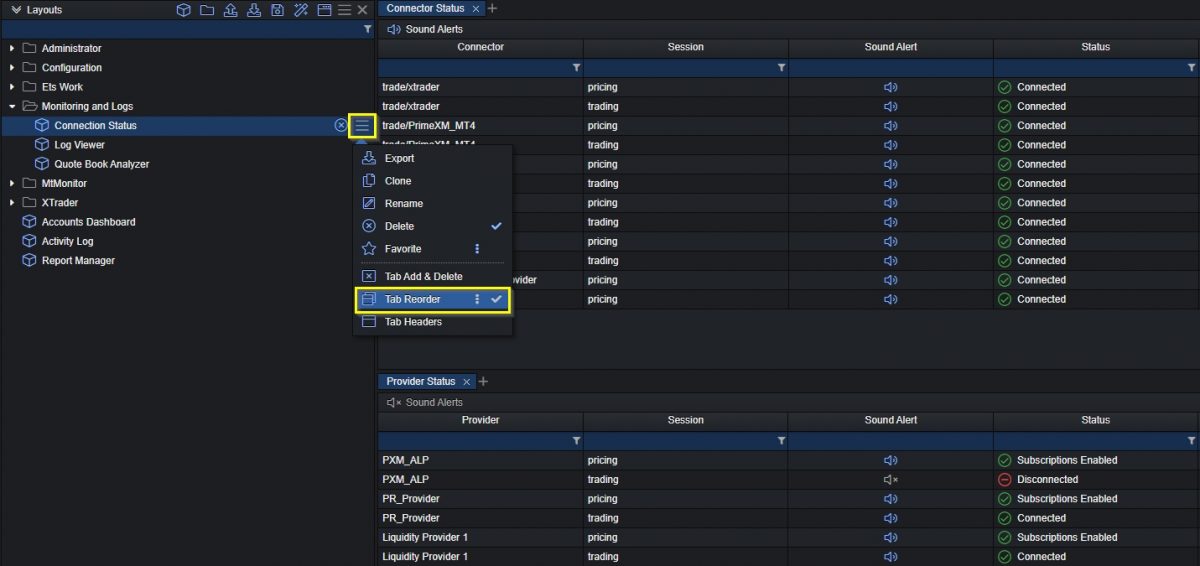
The Tab Reorder button allows the XCore Portal user to anchor the components that are loaded on the layout to avoid accidentally moving them around the layout design. You can achieve this from the additional settings of the layout, press the Tab Reorder button which will anchor the components. To revert, follow the same procedure.
Settings menu
Enhanced setting options can be found in the drop-down menu (Hamburger button) on the top-right corner of the portal.
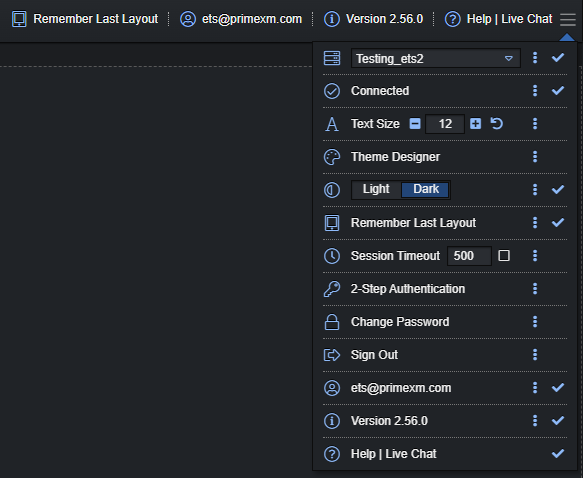
The Setting menu consists of the following available options:
- Instance Selector – select the XCore instance to view (only applicable if you have access to multiple instances)
- Connection status – display of connectivity to the selected XCore instance
- Text Size – adjust the display text size of the interface and undo button to revert to the previous setting
- Theme Designer – customize the GUI display with different colour schemes on a separate pop-up window. Options of Import, Export and Reset the defined theme are available.
- Light/Dark Theme Switch – 1-click switch between Light and Dark display Theme
- Remember Last Layout – When this feature is enabled it allows the user to come back to the same layout he was in before closing the XCore Portal or signing out. When this feature is disabled then every time the user closes the XCore Portal or signs out and comes back he is redirected to the empty screen with no layout selected and then he can select whichever layout is needed.
- Session Timeout – enable or disable the inactivity period in minutes to automatically log out of the portal
- 2-Step Authentication – enhanced security to access your XCore account
- Change Password – change your XCore Portal login password
- Sign Out – log out of the XCore Portal
- Username – display current logged-in username
- XCore Version – display the XCore version, it’s useful to share the XCore version with PrimeXM support for investigation when you report an issue
- Help & Live Chat – direct link to PrimeXM Help Center with all XCore guides and How-to documentation, and Live Chat with our support team
By clicking on the separator button:  , at the end of each option, you can add a line between 2 options. In addition, the tick mark:
  , can be enabled to display the selected options as a shortcut permanently on the top navigation bar of the interface.