Contact Us
At PrimeXM, we’ve streamlined our contact channels for a better client experience. Pick the channel below that matches what you need — each one expands for details.
Microsoft Teams Channels
Microsoft Teams channels give you a direct, familiar line to the teams behind your service — Level 2 support, engineers, and executive management. Onboarding is fully automated, so your users can connect without signing up for an additional service. Escalated concerns, emergencies, and in-depth product discussions reach the right team without delay.
Each client has access to four dedicated channels, each for a specific kind of request:
| Channel | Use it for |
|---|---|
| Support | General support requests and technical assistance, including reporting problems and bugs. |
| Emergency | Emergencies, alerting senior staff. |
| Product Development | Exclusively for product brainstorming and ideas. Expect a response within 24 hours. |
| Hosting | General support requests for PrimeXM Hosting and Connectivity services. |
How to get connected
- Add the required people as Authorized Contact in XCore Portal. This triggers the automated onboarding.
- Organizations using corporate Microsoft Teams accounts can enable Shared channels for direct PrimeXM support. This requires Entra ID administrative privileges to configure B2B collaboration with primexm.com — see the setup guides below.
Customer Success Team
Customer Success is a newly created function designed to give us a clearer, ongoing picture of how our service is working for you. Its core responsibilities are:
- Periodic check-ins. We check in periodically simply to hear how things are going. These are not sales calls. If there’s anything you’d like handled differently, or anything you’re unsure where to raise, those conversations are the right place for it.
- Escalations. If something you’ve raised is not progressing as you expect, Customer Success is the team to tell — the earlier the better. We stay with it until you confirm it is resolved, not until an internal team marks it closed, and take it through whichever departments are needed while keeping you informed.
Practical note: Day-to-day technical requests have to be sent directly to our Support Team, not to Customer Success.
How to reach Customer Success
- Email: customersuccess@primexm.com
- In your existing Microsoft Teams chat with PrimeXM, use the @PRIMEXM_CUSTOMER_SUCCESS tag. This alerts the Customer Success team.
Microsoft Teams Setup
After a contact is added in Authorized Contact list, you will receive an automatic email within a few minutes with the request to join PrimeXM.
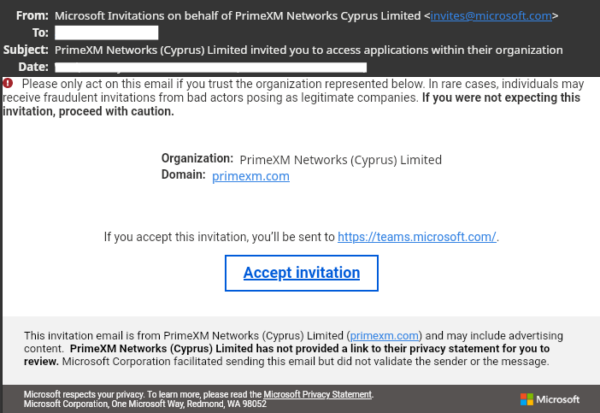
You should also see a similar invitation in your Teams account if you already have one:

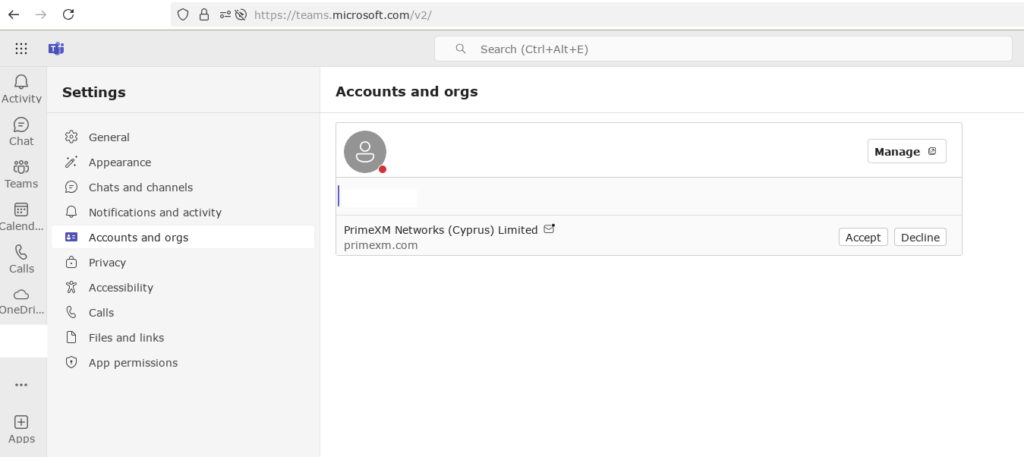
This invitation needs to be accepted.
You’ll be requested to allow PrimeXM to access your profile data (i.e. your first and last names, email address, etc.) and access your activity such as sign in and sign out times when you access PrimeXM organization.
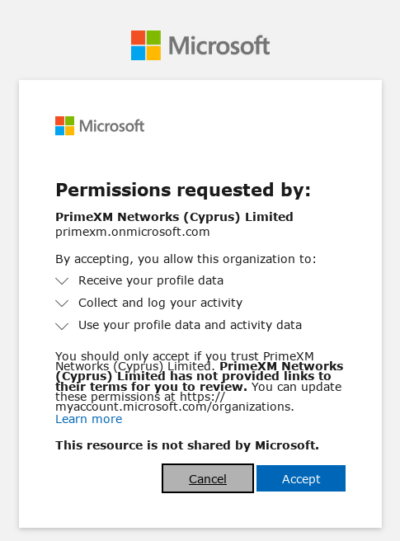
Once you finish the onboarding procedure, you should be able to access PrimeXM organization. For this you might need to restart your Teams desktop client or reload the page if you’re using a browser to access Microsoft Teams.
If you click on your profile icon in the right-top corner, you should see ‘PrimeXM‘ in the list.
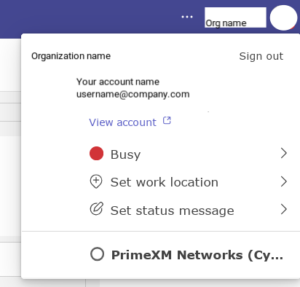
Once you switch, just click on Teams or Chat menu icon in the left menu (depending on your Teams client setup) and you should be able to see the team in the list. By default all channels are accessible, so feel free to join the ones you need. Make sure to configure notifications properly so PrimeXM team members can reach out to you in case of emergency.
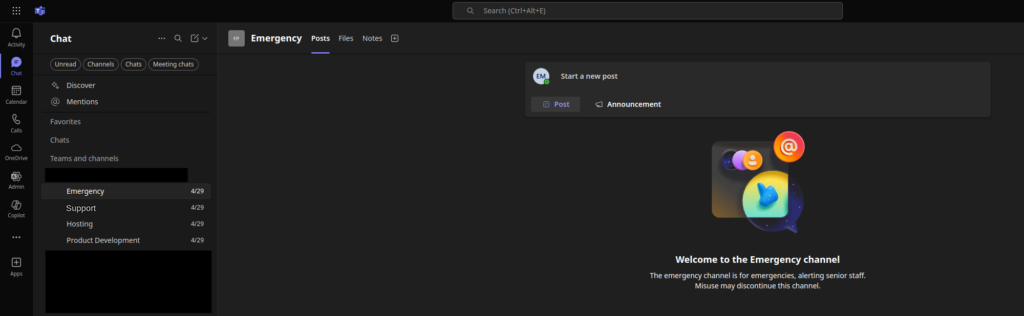
We encourage you to familiarize yourself with the channels to ensure you can reach the appropriate team when needed.
Microsoft Teams Shared Channels Setup — Administrator Guide
Configure B2B collaboration with PrimeXM to enable shared channels in Microsoft Teams for direct support access.
Administrator Access Required
Only users with Microsoft Entra ID administrative privileges can complete this setup.
Step-by-Step Configuration
1. Access Microsoft Entra Admin Center
Sign in to Microsoft Entra Admin Center with your administrator account.
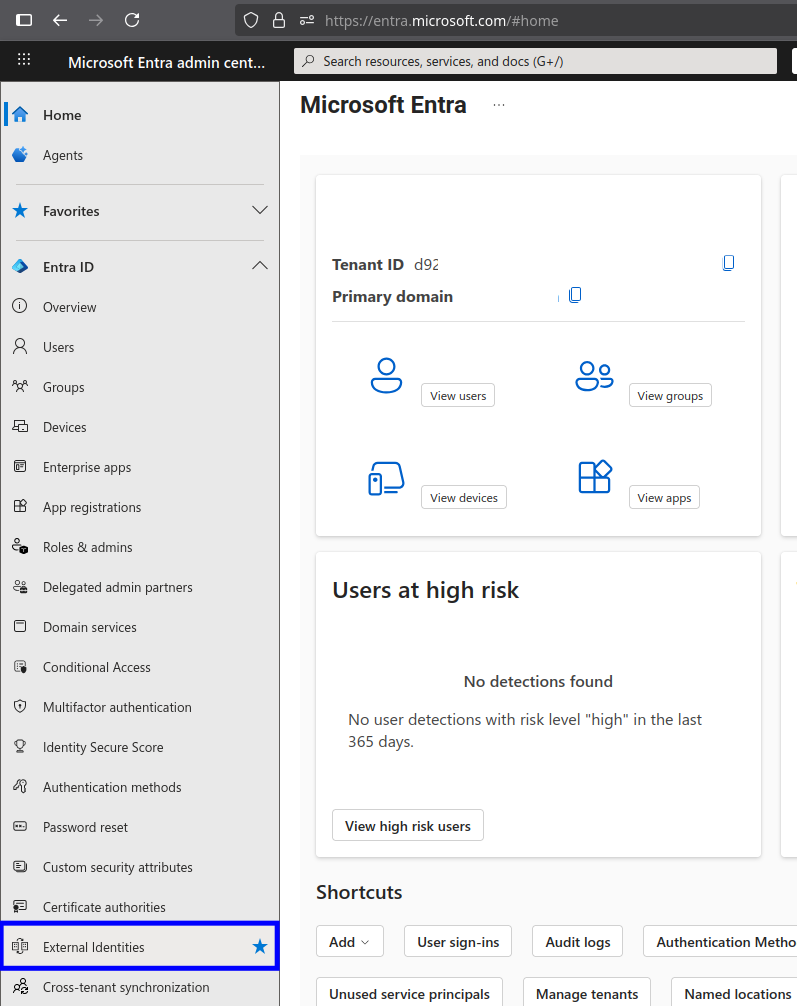
2. Navigate to External Identities
In the left menu, click External Identities.
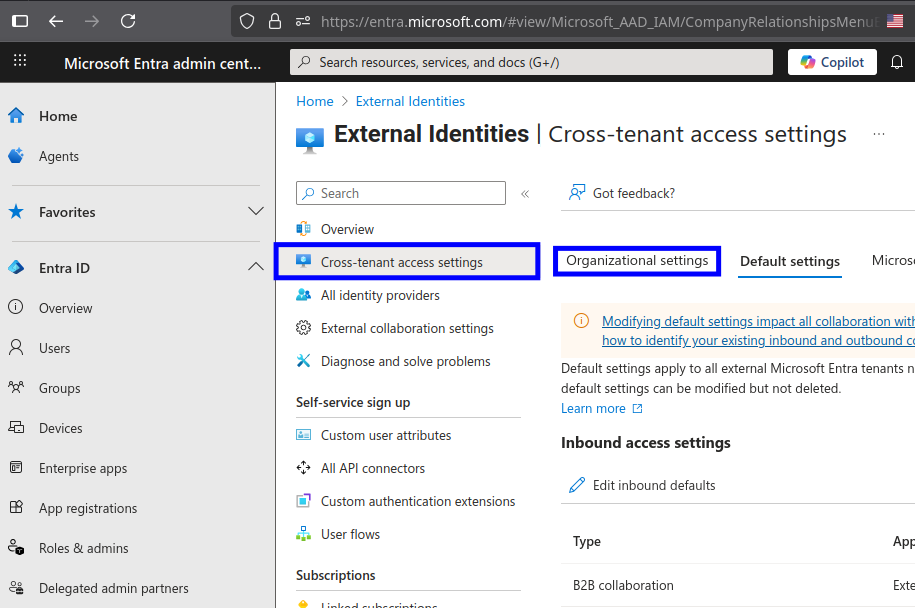
3. Access Cross-Tenant Settings
Click Cross-tenant access settings.
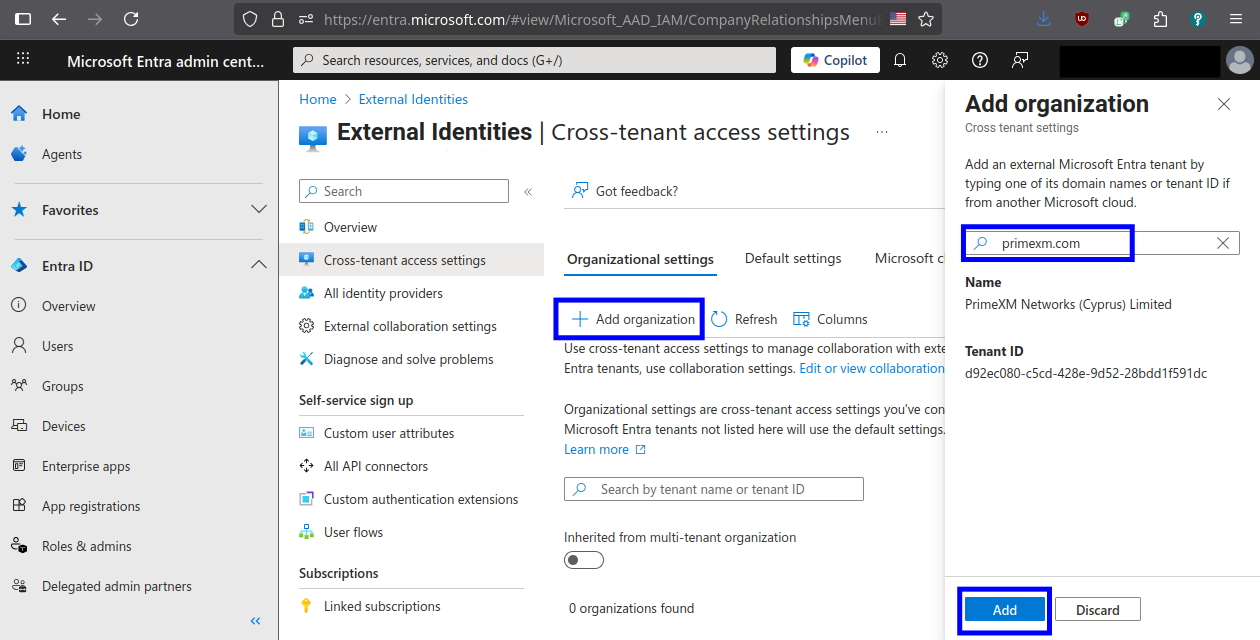
4. Add PrimeXM Organization
- Go to the Organizational settings tab
- Click Add organization
- Enter
primexm.comin the organization field - Click Add to confirm
5. Configure Outbound Access
- Locate the newly added
primexm.comentry - Under Outbound access, click on Inherited from default
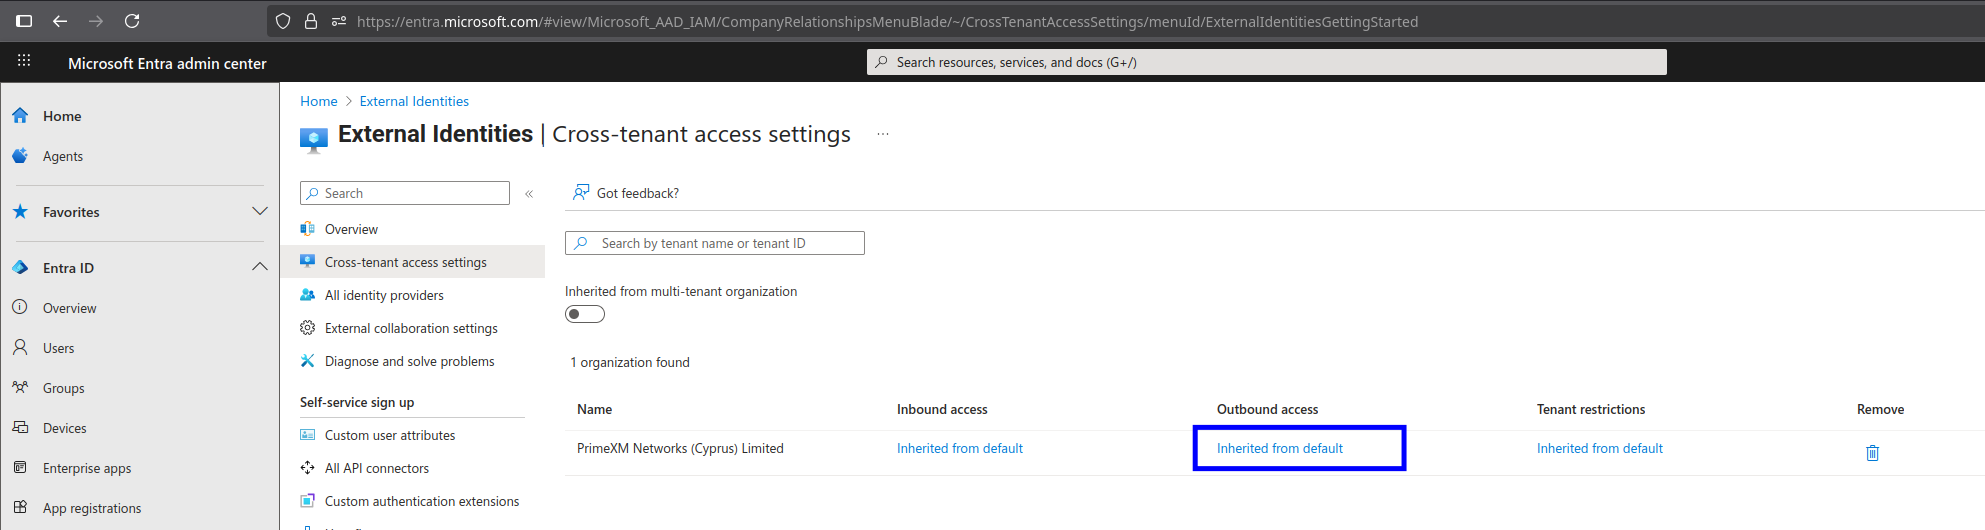
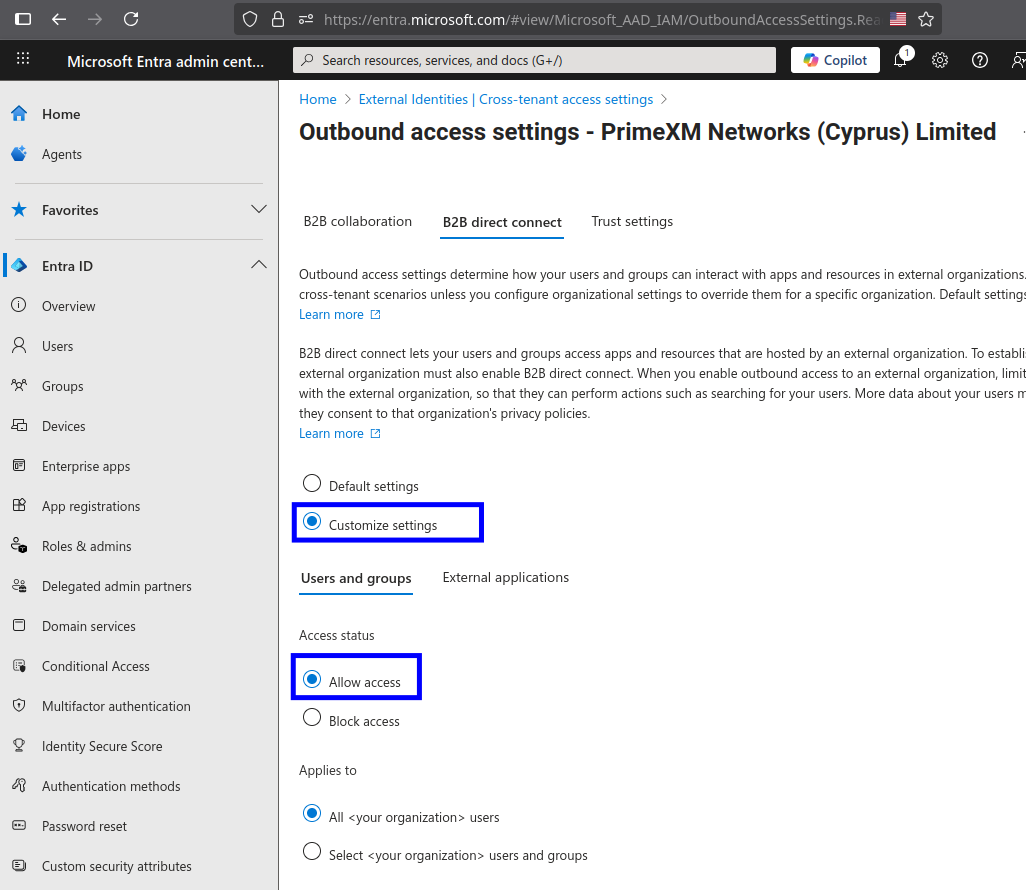
6. Enable B2B Direct Connect for Users and Groups
- Navigate to the B2B direct connect tab
- Click Customize settings
- In the Users and groups section, select Allow access
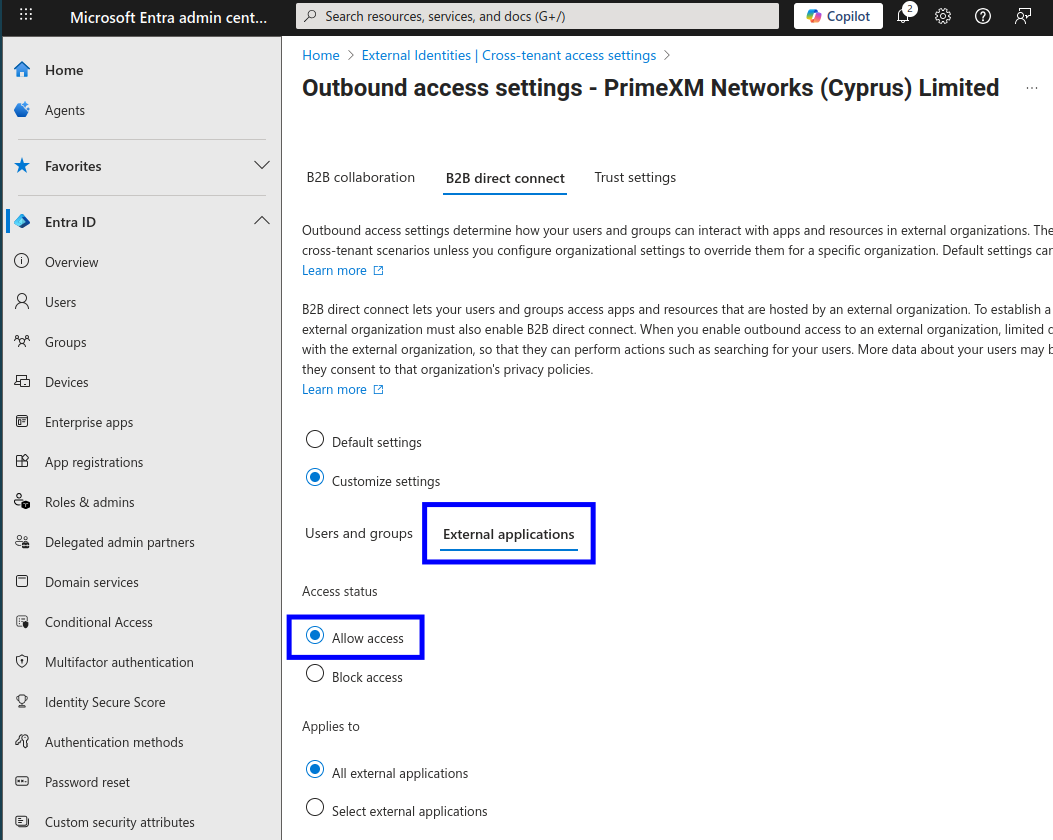
7. Enable B2B Direct Connect for External Applications
- Still in the B2B direct connect tab
- Navigate to External applications section
- Select Allow access
8. Save Configuration
Click Save to apply all changes.
Verification
After completing the setup, your organization should be able to: - Receive shared channel invitations from PrimeXM - Create shared channels with PrimeXM teams - Collaborate seamlessly across organizational boundaries