Trading Panel
XTrader module allows users to place trades directly from the GUI using the Trading Panels. Within the XTrader module, there is a Trading Panel component for showing only a single trading pair at a time and a Trading Panels List component where you can view multiple trading pairs simultaneously in the same component. Using the trading panels, a user can place different types of trades, such as Market and Limit, and view the full book of the prices with the available liquidity at the specific time.
The trading panel component is available in the XTrader module. It can be used to trade directly from the XCore Portal using the necessary trading panel by selecting the Connector Account, Connector Stream, and the necessary symbol.
There could be launched only one trading panel in this component, as it is demonstrated below:
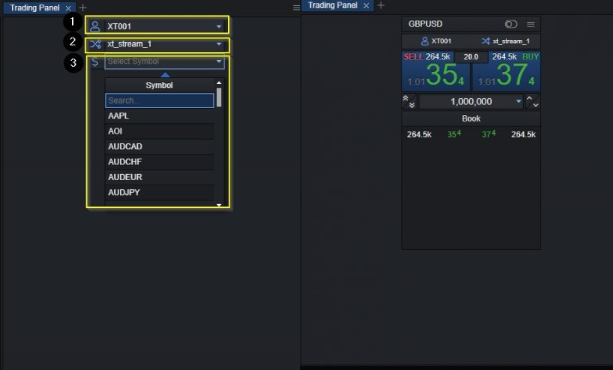
- Select the trading account that represents the trading account found from the Connector Account component under the connector of type XTrader for the Trading panel that will be loaded.
- Select the connector stream on which the trading account will be trading.
- Select the specific symbol for the Trading Panel
Note: By default, the trading panel is loaded in simple mode, which is the one-click trading for orders of type market.
Trading Panel
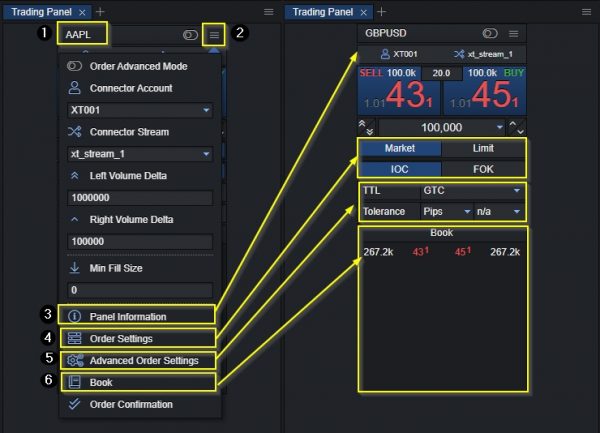
The trading panel is made up of several constituents, as seen below:
- Symbol name of the current Trading Panel.
- Settings Button opens the Settings Configuration Window (detailed hereafter).
- Panel Information indicating the selected Trading Account and Connector Stream can be hidden by unselecting it via Settings.
- Order Settings show the available type of order to select.
- Advanced Order Settings show additional TTL and Tolerance (Deviation) settings.
- Book showing the available liquidity book with prices and liquidity of the selected symbol.
The Order Size Definition Toolbar allows entering the order size to be traded. It consists of the following buttons:
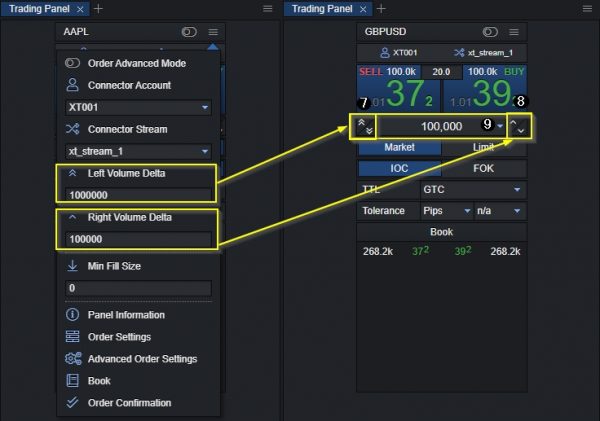
7. Sell Volume Change Button – clicking the arrows signs increases/decreases the Sell order size based on the step defined in Settings Configuration Window.
8. Buy Volume Change Button – clicking the arrows signs increases/decreases the Buy order size based on the step defined in Settings Configuration Window.
9. Order Volume Selection – allows quickly selecting the order size from a drop-down list or entering it manually into the textbox.
Order Type Definition Toolbar
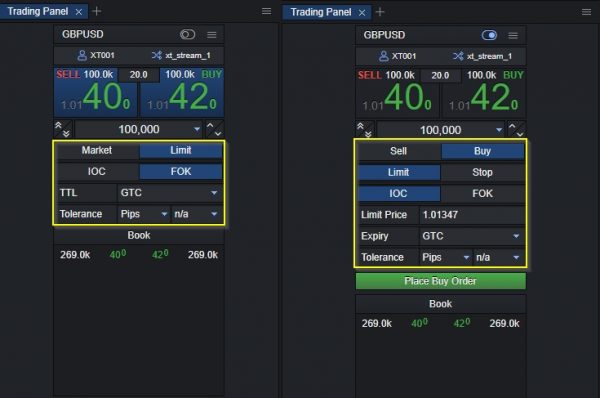
- Order Type Definition Button – allows switching between different types of orders, namely Market, Limit, and Stop order.
- Order Expiration Type Definition Button – allows switching between IOC and FOK.
- Deviation (Tolerance) selection – allows selecting the deviation for order (usually LIMIT), which will be passed to the market.
Note: Tolerance (deviation) can be defined in PRICE, PIPS & PERCENTAGE
Liquidity Book Window
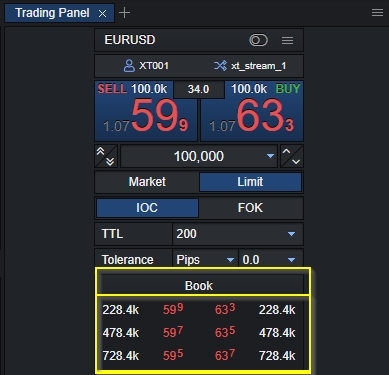
The Liquidity Book Window displays the Market Depth of the selected symbol; it shows prices (bid/ask) and the available liquidity at each layer.
2-Click Confirmation Trading
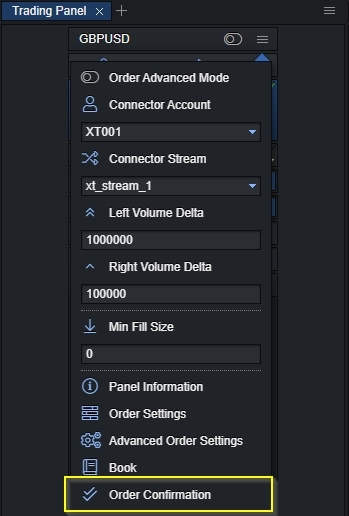
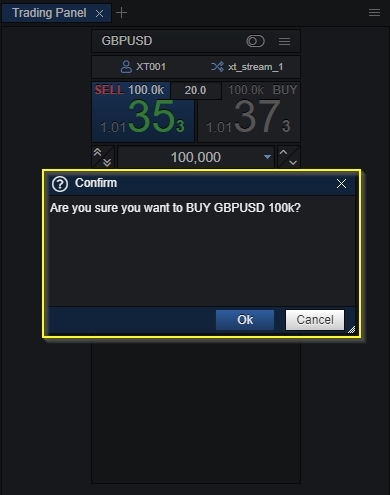
The 2-click confirmation prompts to confirm the trades before sending them to the market and can be enabled or disabled from the Trading Panel Settings as shown below:
Highlight Trade Timer / Highlight Color
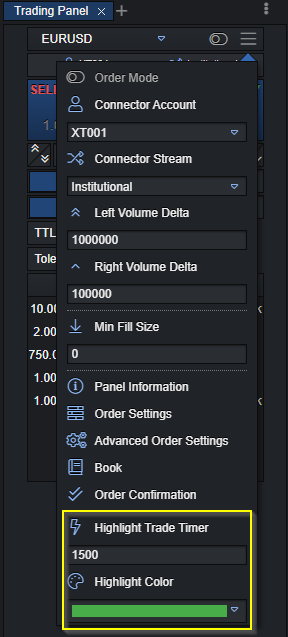
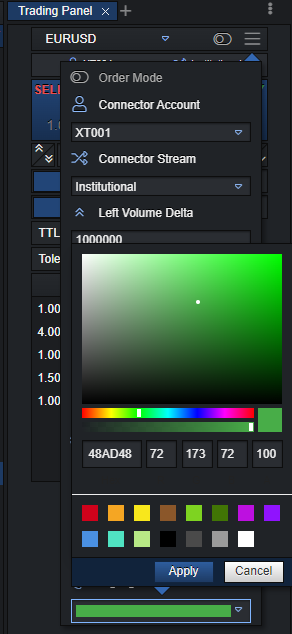
The highlight trade timer and highlight colour functionality allows the user to set the highlighted colour that will be triggered after pressing the SELL/BUY buttons of the Trading Panel and for how long the highlight will remain until it’s faded back to the default colour.
Highlighter Trade Time: set in milliseconds
Ladder Trading
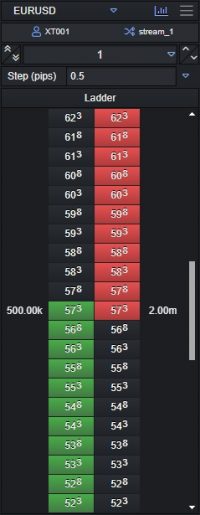
Ladder trading functionality can be used by clicking the ladder button on the top of the Trading Panel.
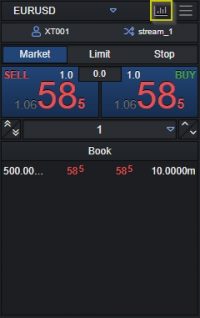
The user will be presented with a ‘ladder’ of BID and ASK prices, on which a LIMIT order can be placed by clicking the desired price. The increments of the prices are user-defined, with the default being 0.5 pips.